Cappadocia Balloon Photography Guide: Camera Settings, Best Angles & Timing
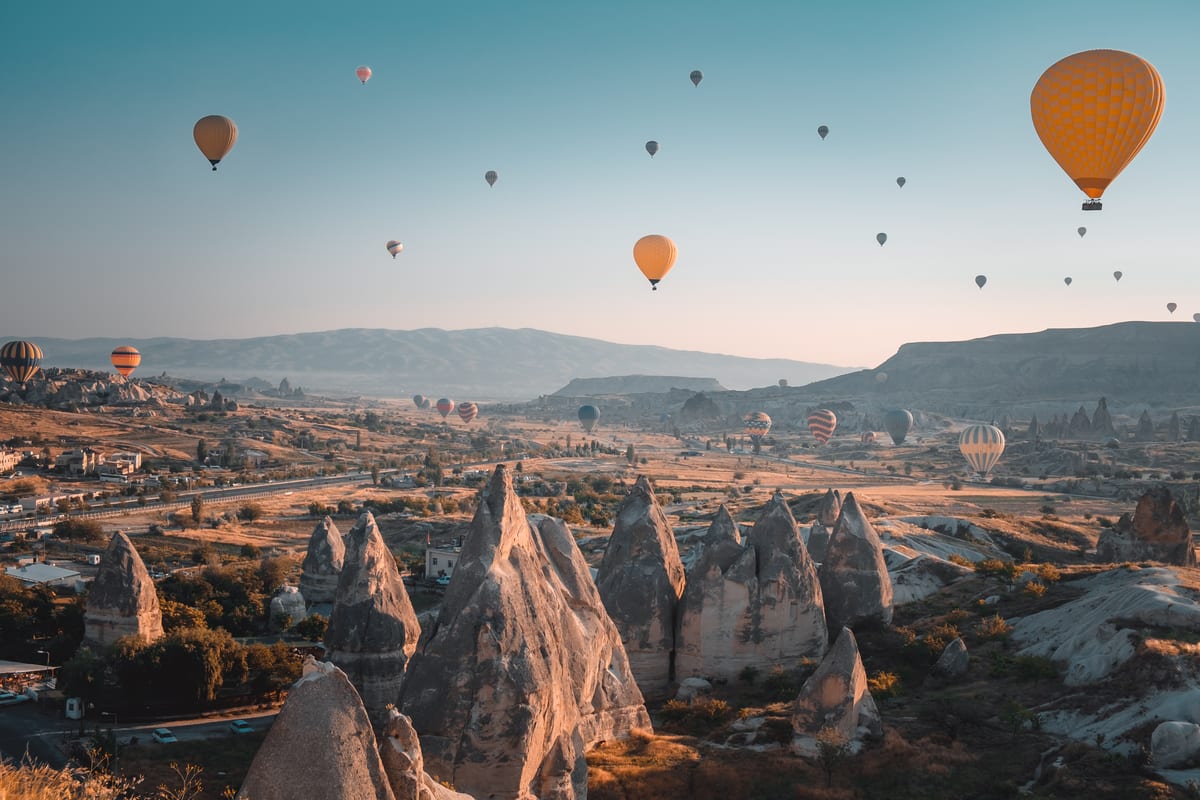
At 5:17 AM, the light turns. The sky shifts from deep blue to salmon pink, and suddenly dozens of balloons are glowing against the fairy chimneys like something from a film set. You have about 20 minutes of this perfect golden hour light before it becomes harsh. Your camera is cold, your fingers are stiff, and you are standing in a moving basket 300 meters above the ground. This guide is about making those 20 minutes count—and capturing great shots throughout the rest of the flight too.
Professional photographers, Instagram creators, and first-time flyers holding nothing but an iPhone all fly this same route. The best camera is the one you know how to use quickly, because the light and composition change fast up there. Here is practical guidance for shooting Cappadocia from the sky—and from the ground.
Golden Hour Timing: When the Magic Happens
Cappadocia balloon flights launch at sunrise, which means the entire flight takes place during golden hour. But the light quality changes rapidly minute by minute:
| Time window | Light quality | What to shoot |
|---|---|---|
| Pre-sunrise (inflation) | Dark blue sky, balloon glow from burners | Silhouettes, burner flames, balloon glow shots. Moody, dramatic images. |
| First 10 min after sunrise | Warm orange-pink, low angle, long shadows | This is the prime window. Balloons lit from the side, fairy chimneys casting shadows, sky gradients. Shoot fast. |
| 10–30 min after sunrise | Warm golden, softer shadows | Portraits, wider valley shots, balloon-over-landscape compositions. Still excellent light. |
| 30+ min after sunrise | Brightening, contrast increasing | Detail shots, patterns, looking straight down at the terrain. Good for video. |
Sunrise times vary by season: around 5:15 AM in June, 6:45 AM in December. Our sunrise balloon flight (approximately 60 minutes) comfortably covers the best light window.
Phone vs DSLR vs Mirrorless: Which Camera to Bring
The honest answer: a recent smartphone (iPhone 14+, Samsung S23+, Pixel 7+) produces excellent balloon photos in golden hour light. The auto HDR and computational photography handle the high-contrast sunrise conditions better than most people can manually. That said, here is how each option compares:
Smartphone
- Pros: Light, fast, great auto mode, shoots video and stills simultaneously, easy to share immediately.
- Cons: Limited zoom (balloons in the distance look small), less control over depth of field, sensor struggles in very low pre-sunrise light.
- Best for: Social media content, casual travelers, anyone who wants to enjoy the flight without fiddling with settings.
- Tip: Use portrait mode for in-basket shots of your partner or friends. Use 0.5x ultra-wide for sweeping valley panoramas. Avoid digital zoom beyond 3x.
DSLR or Mirrorless Camera
- Pros: Full manual control, better in low light, interchangeable lenses, RAW files for post-processing.
- Cons: Heavy, takes up basket space, slower to switch settings in cold hands, risk of dropping.
- Best for: Serious photographers, content creators, anyone who post-processes their images.
- Tip: Bring one body and one lens. Lens changes in a basket at altitude are risky—dust, cold fingers, turbulence from the burner. A 24–70mm f/2.8 is the ideal all-rounder.
GoPro or Action Camera
- Pros: Ultra-wide angle, waterproof, small, great for video, can be mounted on the basket edge.
- Cons: Fixed wide angle distorts close subjects, limited manual control, small sensor.
- Best for: Time-lapse of the entire flight, POV video, supplement to phone or camera.
- Tip: Set it on a mini tripod in the corner of the basket running a time-lapse. You will end up with a stunning 30-second clip of the entire flight.
Camera Settings for Balloon Photography
If you are shooting in manual or semi-manual mode, these settings work well in the Cappadocia sunrise conditions:
Landscape and Balloon Shots
- Mode: Aperture Priority (A/Av) or Manual
- Aperture: f/5.6 to f/8 for sharp landscapes. f/2.8 only if light is very low pre-sunrise.
- ISO: Start at ISO 400–800 pre-sunrise, drop to ISO 100–200 once the sun is up. Auto ISO with a max of 800 works well too.
- Shutter speed: 1/250s minimum to counteract basket movement. The basket sways gently, and the burner creates vibration. Anything slower than 1/125s risks blur.
- Focus: Single-point AF on a balloon or fairy chimney. Continuous AF if you are tracking a moving balloon.
- White balance: Daylight or Cloudy to preserve warm tones. Auto WB often cools down the golden hour light, which kills the mood.
- Format: RAW + JPEG if your card allows. The dynamic range at sunrise is extreme—RAW gives you room to recover shadows and highlights.
Portrait Shots in the Basket
- Aperture: f/2.8 to f/4 to blur the background and isolate your subject.
- Focal length: 35–50mm equivalent. Wide enough to include some sky and balloons behind the subject.
- Direction: Face your subject toward the sunrise light. Side lighting creates beautiful dimension on faces. Avoid shooting with the sun directly behind your subject unless you want a silhouette.
Smartphone Settings
- Turn on HDR (or leave it on auto—most phones handle this well).
- Tap the brightest part of the sky to expose for highlights, then lift shadows in editing.
- Use the grid overlay for composition—place the horizon on the lower third.
- Shoot in HEIF/HEIC for better dynamic range, or ProRAW (iPhone) / RAW (Android) if you plan to edit.
Best Angles and Compositions from the Basket
Your position in the basket determines your angles. Here is what works from each spot:
- Sunrise-facing edge: The prime position. You get direct golden light on the balloons in front of you, the fairy chimneys below, and the sky gradient behind. Arrive at the basket early and ask to be placed in this spot for the best light and the most room to move.
- Looking down: Straight-down shots of the fairy chimneys, vineyards, and patchwork fields are unique to balloon photography. Lean your camera over the edge (with the strap around your neck) and shoot at a 90-degree angle. These images have no horizon, which makes them disorienting and striking.
- Including the basket: Frame a corner of the wicker basket, a passenger's hand on the rope, or the edge of the balloon envelope above you. These foreground elements add depth and a sense of place that pure landscape shots lack.
- Balloon-to-balloon: When other balloons are at the same altitude nearby, shoot horizontally across at them. A balloon against the textured Cappadocia terrain behind it is the classic shot. Use a longer focal length (70–100mm) to compress the distance.
- Straight up: The inside of the balloon envelope above you is colorful and geometric. Lie back slightly and shoot upward—the pattern of the fabric panels with the burner flame makes a strong abstract image.
Photographing Balloons from the Ground
Not flying? Some of the most iconic Cappadocia balloon photos are taken from the ground. The key is location and timing—you need to be in position before the balloons launch, which means leaving your hotel well before sunrise. Here are the best ground viewpoints:
- Goreme Sunset Point (also works at sunrise): The classic viewpoint overlooking Goreme valley. Balloons rise directly in front of you. Wide-angle lens recommended. Arrive 30 minutes before sunrise for a spot—it gets crowded.
- Love Valley viewpoint: Balloons drift directly over the phallic fairy chimneys. The combination of unique rock formations and colorful balloons is instantly recognizable. Less crowded than Goreme Sunset Point.
- Red Valley / Rose Valley entrance: Balloons pass low over the red-tinged rock formations. The warm sunrise light on red rock with colorful balloons above is a warm color palette that photographs beautifully.
- Uchisar Castle: The highest point in the region. You look down on Goreme and the balloons rise to your eye level and above. Panoramic shots work well here with a 16–35mm lens.
- Cave hotel terraces: Many cave hotels in Goreme and Uchisar have rooftop terraces designed for balloon watching. Book a room with a terrace view and shoot from your breakfast table. See our cave hotels guide for the best options.
For a detailed breakdown of all ground photography spots, read our dedicated balloon photography spots guide.
Drone Rules in Cappadocia
This is the section that disappoints most drone photographers, so we will be direct: flying a drone during balloon operations in Cappadocia is illegal and dangerous.
- Turkish Civil Aviation Authority (SHGM) prohibits drone flights within the balloon operation zone during launch and flight hours.
- Why: A drone collision with a balloon envelope could cause a catastrophic failure. With many balloons in the air carrying passengers, the risk is real and the regulations are enforced.
- Penalties: Confiscation of equipment, fines, and potential criminal charges. Enforcement is active in launch areas during balloon hours.
- After balloon hours: Drone flights may be possible after balloons have landed for the morning, but registration with the Turkish SHGM system is required beforehand. See our dedicated drone rules guide for the current restricted-hours window and registration process.
The honest alternative: shoot from the basket of your balloon flight with a proper camera, or from a ground viewpoint with a long lens. The results are better than a drone shot anyway—you get the human perspective of being among the balloons, which a drone cannot replicate.
Instagram-Worthy Shots: A Quick Checklist
Here are compositions that tend to work well for balloon photos in Cappadocia:
- Person looking out over the basket edge with balloons in the background (shot from behind or profile)
- Two hands holding champagne glasses with balloons and fairy chimneys behind
- Straight-down aerial of patchwork fields and fairy chimneys
- Balloon shadow on the ground below (works best when flying low over a valley)
- Row of balloons at different altitudes creating depth (horizontal shot with compression)
- Silhouette of passengers against the pre-sunrise sky (shot from an adjacent balloon or the ground)
- Envelope fabric pattern from directly below looking up at the inside of the balloon
- Couple portrait with soft sunrise light and out-of-focus balloons behind
For specific Instagram locations on the ground, see our Instagram spots guide.
Common Mistakes (and How to Avoid Them)
- Forgetting to charge batteries in the cold: Camera batteries drain noticeably faster at altitude in cold air. Charge fully the night before and bring a spare in your jacket pocket (body heat keeps it warm).
- Lens fog: Moving from a warm hotel to the cold launch field causes condensation on your lens. Arrive early, let your camera acclimate for 10 minutes before shooting, and bring a microfiber cloth.
- Shooting only wide: Everyone gets the wide establishing shot. The photos that stand out are the details—hands on the rope, burner flame against blue sky, a single balloon against a textured valley wall. Zoom in.
- Over-editing: Cappadocia sunrise colors are already dramatic. Heavy saturation and HDR filters make photos look artificial. A light touch in editing—slight contrast boost, gentle warmth—is all you need.
- Spending the whole flight behind the camera: This is the biggest mistake of all. Shoot actively for the first 15–20 minutes when the light is best, then put the camera down and experience the flight. Your memory of floating silently over the fairy chimneys is worth more than the 200th photo.
Gear Checklist for Balloon Photography
- Camera or smartphone (fully charged)
- One versatile lens (24–70mm or 24–105mm)
- Spare battery in jacket pocket
- Memory card with plenty of space (shoot RAW and you will use 20–40 GB)
- Camera strap (strongly recommended—avoid holding a camera without a strap over a basket edge)
- Microfiber cloth for lens fog
- Thin gloves with touchscreen fingertips (your hands will be cold at 3–8 °C)
- GoPro or action camera for time-lapse (optional)
- Mini tripod for GoPro basket mount (optional)
For a complete packing list including clothing, see our what to wear guide.
What to Expect for Photography on Your Flight
Our sunrise balloon flight (from EUR 150 per person) carries 22–28 passengers for an approximately 60-minute flight, and you are welcome to shoot freely on your own camera throughout. Claim a spot on the sunrise-facing edge early for the best angles, and see the full flight details before you book.
Post-Processing Tips
- White balance: Shift slightly warm (toward yellow/orange) to preserve the golden hour feel. Auto WB in editing software often neutralizes the warmth.
- Shadows and highlights: Pull up shadows slightly to reveal valley detail. Pull down highlights to recover sky color. The dynamic range at sunrise is extreme.
- Clarity/texture: A slight boost (+10 to +20 in Lightroom) sharpens the fairy chimney textures and balloon fabric patterns.
- Dehaze: A touch of dehaze (+5 to +15) cuts through the morning mist that sometimes sits in the valleys. Too much makes the image look artificial.
- Crop for composition: Shooting from a moving basket means your horizons will not always be straight. Straighten and crop in post. The rule of thirds applies—place the balloon cluster or a key fairy chimney at an intersection point.
Related Articles
Cappadocia Travel Guide for First-Time Visitors: Everything You Need
Cappadocia travel guide for first-time visitors: how to get there, where to stay, balloon flights from EUR 150, food, culture, and day-by-day planning tips.
Best Time to Visit Cappadocia for a Balloon Ride: The Complete Month-by-Month Guide
Best time to visit Cappadocia for a balloon ride, month by month. Weather data, cancellation rates, crowd levels, and seasonal comparison for all 12 months.
Cappadocia Balloon Proposal Planning: The Complete Guide
Plan a Cappadocia balloon proposal: how to arrange a special request, ring safety, decoration ideas, and timing tips. Step-by-step guide.
Ready to Capture Cappadocia from the Sky?
Sunrise balloon flights from EUR 150 per person. Hotel pick-up, a light snack with hot and cold drinks, and champagne included.